Garden Makeover in the Rain

Rainy days are good for a garden makeover, except for the mess that is inevitable. Today was such a day. Gardens4u got this project going early this morning before the rain started, but a drizzle started a few hours in, followed by a torrential downpour. Downpours to me mean lunchtime, sitting in my van. Luckily, the rain subsided enough for me to continue until the job was complete. Well, except for the cleanup. Trying to sweep up my mess on the wet stone was not very effective. Nothing a hose down won’t fix though, a job I left for the homeowner when the rain stopped, long after I left.

These are the “before” pictures. The tree is a dead maple that was removed with the stump ground down before I started the makeover…

The burning bush (far right in second pic), lilac (center in the first pic), and hydrangea (right corner in the first pic) were salvaged, with the lilac getting a good pruning to whip it into shape. Everything else was removed. New shrubs and perennials were strategically planted and composted manure, my new favourite soil amendment, was added.

Here are the “after” pictures…

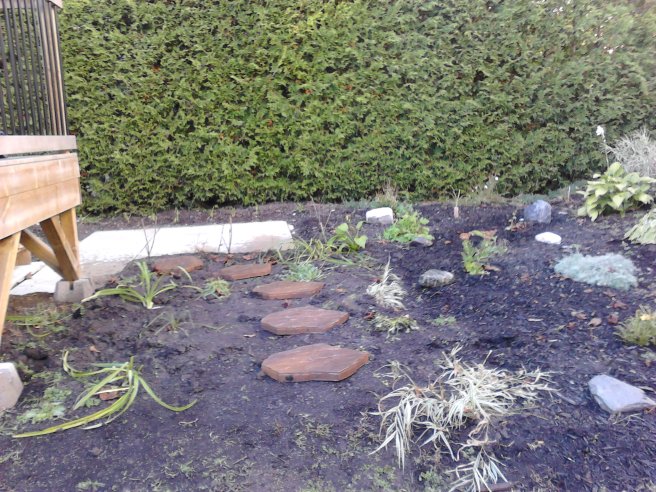
New plantings in this garden makeover include a pink magnolia (center of bed), a “Wine & Roses” weigela, several ornamental types of grass, coneflowers, pink and purple sages, and lavender, as well as several varieties of sedum and stonecrop to spill over the edges of this sunny garden. Once the new plants are established and well-watered, I will add mulch to complete the job.

A second bed, between the sidewalk and the garage, is next up on my garden makeover list. Stay tuned for more before and after pictures.

Backyard Makeover by Gardens4u

In a previous post I talked about a makeover Gardens4u started in a friend’s backyard last fall. This client wanted a small patio surrounded by gardens with very little grass to cut. She also requested the cost be kept to a minimum.  

We started by layering newspaper, soil, and leaves in the area that was to be garden, leaving it over the winter months to decompose.  This spring it was dark, rich soil with only a few pieces of newspaper remaining to be raked up from the garden bed.  The lesson learned here was to ensure the newspapers are applied thickly and overlapping so that the grass is completely smothered.  The newspapers must then be completely covered by soil and leaves; you cannot have too much soil or too many leaves.  The newspaper should not be visible.  The layers must then be wet well to prevent the leaves from blowing around.

Plants recycled from other gardens were added throughout the summer, then mulch to complete the garden area.  I prefer the black cedar mulch as it compliments the green plants and smells great.

The patio was constructed using pavers discarded by another friend who was replacing the pavers from her sidewalk with interlocking brick. She happened to live close to this project, an added bonus.  The patio is just large enough to fit a few lawn chairs or a lounger.

backyard garden project

Next, stepping stones were added leading from the deck and patio to the small patch of the remaining lawn. More plants and additional mulch were then added around the patio, deck, and pathway..

backyard garden project

The final step was to treat the lawn for weeds, then overseed it so that by next spring it will be lush and green, complimenting the rest of the yard.  Be sure to wait at least six weeks after treating for weeds to overseed your lawn so your new grass sprouts will not be affected by the weed treatment.

The makeover was a complete success, with cost kept to a minimum by using recycled materials as well as the homeowner’s and her son’s muscle power:

I can’t wait until next season, to see how it looks when the plants have a chance to settle into their new homes.  Next spring I will edge the garden area so there is a distinct demarcation line between the garden and lawn, and so cutting the lawn will be simple…stay tuned!

Garden Makeover by Gardens4u

garden makeover

In my first season (summer 2012) in my new business, I was asked to transform a dated and overgrown garden into a more modern-looking and low-maintenance garden.  I enlisted the help of my 22-year-old son and husband to help me remove the “foundation style plantings” that were popular around homes back in the 1980s and earlier.  The cedars, junipers, and mugho pines were huge and had totally outgrown their allotted space.  A garden makeover was much needed.

We removed most of the old overgrown plants, pruned the ones I wanted to keep, and trimmed off the lower branches of the large pine tree that were blocking the view of the house and garden from the street as well as blurring the line between the garden and the rest of the front yard.  I then gave the garden a new shape, using the curve of the sidewalk as a guideline…

It was then time to add new plants.  I chose low-maintenance shrubs and perennials (plants that come up every year) in a variety of color, shapes, and textures, replanting some that were removed from this client’s garden and using some that I had removed from other client’s gardens.  I believe in recycling the perennials and shrubs that people no longer want in their gardens, so take them home to pot them up after removing them and then use them elsewhere.  This practice helps to reduce the cost of my services and is much appreciated by my clients, especially those following a strict budget.

A layer of black cedar mulch was the final step of the garden makeover to help hold moisture in and keep weeds out.  I prefer the black or dark brown mulch as it looks like wet earth, giving the garden a natural appearance…

I have been back to this garden makeover many times for general maintenance and a bit of “tweaking”; it looks great now that the plants have filled in.  I do not like to plant perennials too close together initially as they get overgrown quickly, causing grief for my clients…

This is what the garden looks like this summer, two years later:

garden makeover